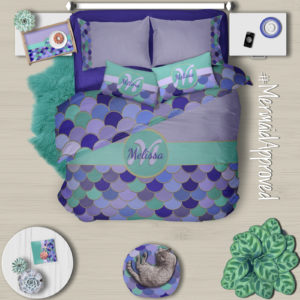
Mermaid Scales Digital Design & Craft Tutorial
Is your little girl’s favorite color “mermaid”? Or your niece asks to watch The Little Mermaid every time she comes over for a visit? Or maybe your granddaughter is still wearing her mermaid Halloween costume — and it’s June?
Whatever the reason you’re interested in creating something the color of mermaid, we’re going to show you how easy it is! Seriously. It’s just circles!
Ready? Set. Go!
Let’s start with a computer and digital version. Believe it or not, you can do this in Microsoft™ Word! Create a new blank document. We’re going to presume you know Word basic usage, and we’re being general — this isn’t going to be a click-by-click tutorial, since your version of Word may be either Mac or PC and a different version/release than ours.
Here are the basics:
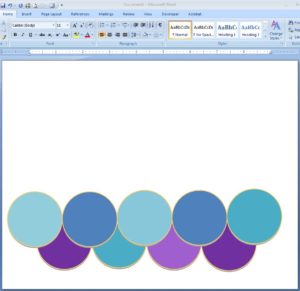
- Click Insert, choose Shapes, and select the Oval
- Hold the Shift Key and draw a Circle
(Holding Shift makes it a perfect circle and not an oval.) - Right Click and select Format AutoShape
- Change the border and fill colors to a shade of gray
- Drag your Gray Circle to the bottom left of your document
- Copy it; paste it to create a second Circle
- Drag the new Circle to completely overlap the first, and then drag it slightly higher than the first
- Make the border a shade of yellow-gold and 2 points and the fill to purple
- Now the Gray Circle should be peeking out like a little gray shadow
- Congratulations — you made your first mermaid scale!

Repeat these steps, placing new circle pairs to the right of and just touching the previous circle pair. While you’re copying, pasting, and moving your circles, pay special attention to a little movement that I would describe as a “click” — it doesn’t make a sound, but you’ll see your circle pairs ‘snap’ into place. That’s Word aligning your circles just right, and it’s a good thing. 😉
Randomly choose fill colors for the colored circles in the shades of purple and teal you like. There’s no right or wrong way to select colors. Just select colors you like. When you’re ready for the second row, start with the first circle in the second row overlapping the first circle in the first row by half top/bottom and half left/right.
Don’t have Microsoft™ Word? No problem! You can do this same concept in any computer program which lets you create circles and overlap them.
With your new sheet of mermaid scales complete, you can print the page and wrap a small package, add text to make a greeting card, print for decoupage or another craft.

No Computer Software?
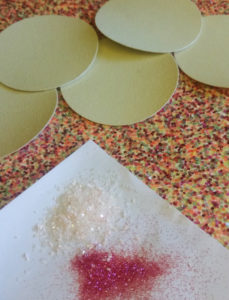
No problem! This is a super-easy paper or fabric craft! So easy, in fact, that you and your littlest mermaid-lover can do it together! Just use any size round craft punch — like these at Amazon; (most well known brands work just fine on paper) — and cut circles out of your favorite papers. Glitter papers, printed pattern paper, solid colored papers — it doesn’t matter. Use whatever you like!
After your circles are punched, you can use glitter glue to adhere and/or trim around the edges. You can also use plain glue or a glue stick, and then use a liquid glue around the edges and add glittery edges.
To use fabric, you need a fabric circle cutter — here are some offered at Amazon (unlike paper punches, I can’t vouch for any of these; do your homework before buying — and then the same concept applies. Finish the edges with fabric paint or glitter fabric paint, depending on how you’re going to use your mermaid scales pattern.
Another idea with (sea) legs: Try this with fondant icing for a cake! You can use a round cookie cutter to make the circles.
Do you have other ideas? Let us know what fabulous creation you made into a mermaid extravaganza!
Voila! That was easy, right?
To see Nautical Boutique Co.’s own mermaid scales creations, click here.
And that’s that, my fellow crafters! If you’re looking for a custom mermaid creation and prefer we do the heavy graphics lifting for you, get in touch with us here. Let’s create something fabulous!


