Because Mermaids Do Exist! Don’t they?
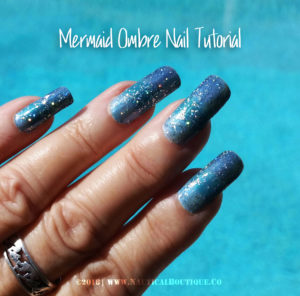 Someone recently told us that mermaids don’t exist. You don’t believe that, do you? With some 95 percent of oceans unexplored and the inability to prove a negative, we disagree. Strongly!
No matter. The rest of the world can believe what they want — it’s their right. We’re going to go right on believing and supporting our mermaid friends, especially since it’s a mermaid who leads our design department!! 😉 (And it’s in her honor that we present this mermaid ombre nail design tutorial.) So something did come out of that conversation — a strong desire to do mermaid ombre nails! And we’re here to share it with you now. 😀 It’s super easy — easier than you probably think — leaves room for error (precision not required), and will wow your mer-friends and non-believers alike!
It will, honestly, take you longer to read this post than it will to do your nails.
Materials Needed for Mermaid Ombre Nails
We recommend getting everything together in your work area before you begin. {Don’t want to ruin your pretty mermaid nails along the way by having to go grab something else, now, do you?}
- 3 Nail Polish or Acrylic Craft Paint Colors
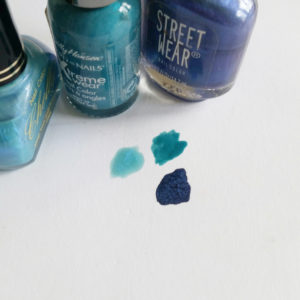
Ombre nails can be done in any color scheme. We’re using teal and purple. When selecting nail polish colors, we recommend choosing your light and dark colors first. Choose two colors which complement each other, but are contrasting. Imagine converting them to black and white — do they blend? Not good. Would you still be able to see the difference in them? Good! Then choose a middle color which matches both the light and dark. We chose a light bluish teal nail polish and a deep purple nail polish. Then we went for a teal nail polish that was a hue between the two. You can see in the photo how the middle shade matches both the light and dark polishes separately.Another note, while we’re on this important topic: We tend to favor OPI™ nail lacquers for their high quality and smooth appearance. For an ombre nail cover, however, it doesn’t matter what you use. The polishes we selected are, if we’re being honest, really old. That says a lot about their staying power, right? The point is that you don’t need to go run out and get the latest, greatest most expensive polish to accomplish this look. It’s very forgiving.
Finally, YES, you can use acrylic craft paint! The process is the same, except that you need to make absolutely certain your nails are dry before adding your first top coat {the glitter coat}. If your acrylic paints aren’t dry, they’ll smear. That’s not so bad for this design, but the paints may also get into your clear coat. Do a test before you commit. 😉
- 1 Makeup Sponge {the dense, wedge-shaped type}
Some are sold as “artist sponges” and others may carry a heftier price tag. We have some imperfect sponges in a craft drawer — we used one of those. - 1 Base Polish
This isn’t, honestly, 100-percent necessary, but we find that any finished polish will have better staying power with a good base coat. We like Seche Base. - 1 Glitter Cover Polish
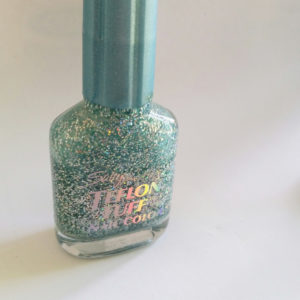
As long as it glides on smoothly, any glitter polish that doesn’t do full coverage is going to work. We want a glitter effect. We’re looking for Glinda the Good Witch to enchant your nails; not throw up on them. 😉 - 1 Clear Cover Coat Polish
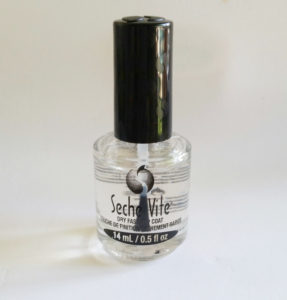 A good cover coat will help protect your nail polish finish, but is especially recommended when using a glitter coat. We’ve been doing our own nail art here long before it was fashionable, and we won’t do our nails if we’re out of Seche Vite. It’s may be starting to sound like we’re Seche stock holders or something. We’re not {though that would be nice!}. It’s just a product that’s earned our recommendation! This is the best cover coat — and fast drying — we’ve used in 30+ years, and we’ve been using it for 5 or 6 years now. In any event, choose your favorite, and use it.
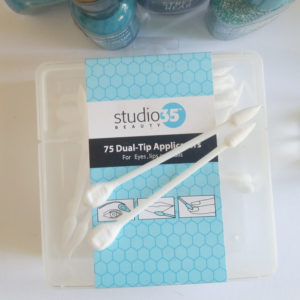
 - 3 or 4 Dense Cotton Swabs on Sticks
If you use regular cotton swabs (Like Q-Tip™), make sure to twist the cotton tightly, to avoid fly-aways getting into your nail polish. Otherwise, we like this type of swab. - Nail Polish Remover
It’s going to get a little messy — only a little — and you’ll need to wipe away the excess nail polish. We like the type of dispenser with a push top. If you don’t have one, pour some nail polish remover in the lid of your bottle. You’ll be dipping your cotton swabs in it.
Let’s Begin!
- Remove old nail polish to ensure you’re starting with clean nails.
- Apply your base coat.
Let it dry. Feel free to read some of our other blog post, while you wait. 😉 - Now apply your nail polish colors to the makeup sponge.
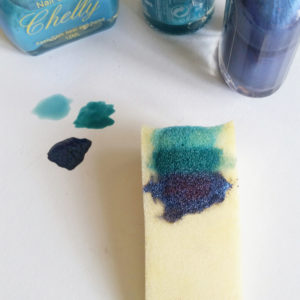
You’ll do one stripe in your light color, another stripe in your middle color, and a third stripe in your dark color. The combination of all three stripes should be as wide and long as your biggest nail. Don’t glob on the nail polish, but do saturate the sponge. - Apply the nail polish to your nails by carefully rolling the sponge from right to left or left to right, whichever feels most comfortable to you. If coverage isn’t complete, roll a second time. Don’t worry about getting nail polish on your fingers.
- Re-apply nail polish stripes to sponge, and roll onto the next nail.
- Continue until all nails are done.
- Go back and do your second coat the same way you did your first.
The nail polish isn’t applied thickly using this application method versus brushing on, so there’s no need to wait for nails to dry more. Go back and do your second coat the same way you did your first. - Using your dense cotton swabs to clean the nail polish that rolled onto your skin.
Event with two coats, the polish isn’t that thick. But don’t wait to do this step. Cleaning now, while the polish isn’t yet set, will be easiest. Dip the swab into your nail polish remover, and use it to carefully clean the skin around your nails with a gentle rubbing motion. - Apply glitter nail polish. One coat will be fine.
- Let your nails dry until they’re not “tacky.”
Feel free to shop all things nautical, while you wait. 😉 - Now apply your final clear cover coat.
If you used the Seche Vite Dry Fast Top Coat, it’s only going to be a couple of minutes before you can do casual things. Honestly, we usually go to bed after about 5 minutes. 😉 If you didn’t use Seche Vite, let dry and browse. Carefully, of course!
That’s it! Enjoy and wow your mer-friends!
If you want an extra measure of protection or used an especially coarse glitter coat {we did}, you can do an additional clear coat a day later or the next day.
See? That was easy, right?
And Even Easier Yet…
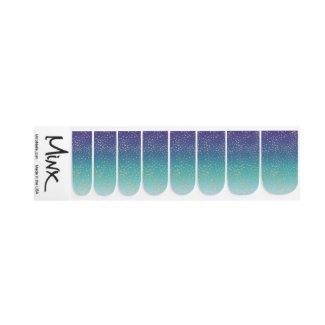
If you love the look and would rather do nail wraps, try these:
The mermaid who penned this lovely mermaid ombre nails tutorial is an avid nail art enthusiast, having created her own nail art designs she was 16 and long before it was considered stylish. She’s also an experienced crafter, soap maker, graphic designer, and marketer.

